The Convenience of Recurring Orders with Foulgers Dairy
At Foulgers Dairy, we understand the importance of making life easier for our customers. That’s why we’re excited to offer the option of recurring orders, ensuring you never run out of your favourite dairy products. This blog will explore the benefits of our recurring orders, explain how the process works, and provide a guide on how you can get started.
The Convenience of Recurring Orders
Recurring orders provide a seamless and hassle-free solution for keeping your fridge stocked with fresh dairy products. Whether you’re managing a busy household or running a workplace, our recurring order service ensures you receive regular deliveries without the need to constantly reorder.
Benefits of Recurring Orders
- Time-Saving: Save valuable time by setting up your orders once and letting us handle the rest. No more last-minute trips to the store.
- Consistent Supply: Ensure you always have fresh milk, cheese, yogurt, and other dairy essentials on hand.
- Customisable Schedules: Choose the frequency that suits your needs, whether it’s weekly, bi-weekly, or monthly deliveries.
- Flexible Adjustments: Easily adjust your order preferences or pause deliveries as needed.
How to Get Started & Where We Deliver
Ready to simplify your life with recurring orders from Foulgers Dairy? Follow these easy steps to get started:
- Create an Account: If you don’t already have one, create an account for a more streamlined ordering process.
- Select Your Items and Schedule: Choose the products and delivery frequency that best suit your needs.
- Complete Your Order: Enter your delivery and payment details to finalise your recurring order setup.
We are proud to deliver to a wide range of areas in Suffolk and surrounding areas, ensuring that many households and workplaces can benefit from our convenient service.
Explore Our Wide Range of Products
At Foulgers Dairy, we offer a variety of high-quality dairy products to meet your needs. Our locally sourced milk comes in whole, semi-skimmed, and skimmed options, available in different sizes.
We don’t just stop at dairy. We also offer a selection of fresh fruit and vegetables, sourced locally whenever possible. From crisp apples to vibrant salad greens, our produce is carefully chosen for freshness and flavour.
In addition to dairy and produce, we provide a range of grocery and bakery items to complete your shopping needs. Our grocery selection includes pantry staples like bread, eggs, and honey as well as snacks and drinks.
Explore our wide range of products Our Recurring Deliveries
What are the best foods to eat in the heat?
It’s been a scorcher and staying cool in this weather can be difficult. We’re all keeping windows and curtains closed to keep the heat out, drinking plenty of water, and ensuring we’re not travelling unnecessarily. We’re protecting ourselves from the heat by sitting in the shade where possible and avoiding sitting outside in the peak sunlight hours too. However, dehydration and overheating are still a worry, and we always wonder if we could be doing more.
Did you know that there are some ingredients and drinks that can help beat the heat and stay hydrated? Try incorporating some of these into your everyday routine to stay cool when a heatwave hits!
Hot drinks
Drinking a hot drink is generally considered as a great way to cool you down – unless it’s very humid then it’s best to avoid them and stick to cold. A cup of tea or coffee will lower the amount of heat inside your body, this makes you sweat more and when it evaporates from the skin it cools the body. So, really there is no excuse not to have a cuppa!
Bananas
If you’re feeling sluggish then a banana is a great way to boost your energy and will keep you going during the day. Bananas are also great for water absorption in the body due to their astringent nature, meaning they are great in hot weather to help your body cool down.
Cucumber
As cucumbers are mostly made of water, they are a great refreshing snack to have during the summer. Cucumbers can help to rid your body of toxins as well as being great for hydration. You can also gently rub cucumbers on sunburn to help reduce the itching or alternatively, lay the slices on your skin for 20 minutes and let your body soak in their juice. Leave this on for a while before washing it off.
Salads
Not only are cucumbers great for you in the summer but so are salad ingredients in general. This is due to their hydrating properties and ability to fill you up without being overindulgent, which can leave you feeling like you have a low energy. Tomatoes, berries, leafy greens, and watermelon are all great hydrating foods that can keep you feeling more energised in this weather.
Onions
Surprisingly, onions are a great food to add to your meals during that heat as they contain potassium and sodium which helps keep you hydrated. Onions can also be good for summer ailments such as heat rashes, as they are thought to have anti-histamine-like properties that can help ease rashes and bites. Adding an onion to your lunch or dinner might help you feel better in the excessive heat.
Ice lollies
This is an obvious one but, in this heat, you want to avoid making unnecessary trips to the supermarket, so you might want to make your own lollies at home. You can use juices, milkshakes, yoghurts and fizzy drinks to make the lollies, whatever you have in the house – you can even add fruit!
However, if you don’t have any moulds there are a few crafty solutions! You can use yoghurt pots, ice cube trays, and plastic cups, or place some cling film in a muffin tin or something similar and fill it with your desired lolly filling, then use it just as you would any other mould by placing it in the freezer to set. They can take 6-8 hours to freeze so make them first thing in the morning ready for the late afternoon.
Ways to use up staples nearing their best before date!
Finding new ways to use your favourite ingredients isn’t always easy, especially when the best-before date is looming! You can easily forget about something in the fridge or get bored of using it the same way, so getting inventive with your ingredients can help extend their lifespan and let you enjoy something new.
It’s also a great step to reducing your food waste as it is reported that on average a family will discard approximately £810 worth of food each year, so making your products stretch a bit further can help save you money.
There are lots of tip and tricks to try new things and save on food waste, and we’ve rounded up our favouritesfor you to try.
Orange juice
If you want to make a carton of fresh orange juice last longer, there are a few things you can do, including making ice cubes and ice lollies. Ice cubes can be used in smoothies, and ice lollies are a fun activity for the kids to make and then a tasty reward afterwards.
With BBQ season upon us, you might also want to try giving ribs a squirt of orange juice to give them an extra tangy flavour.
You can also add orange juice to scrambled eggs to make them slightly sweeter – pulp-free is best for this one!
Sparkling water
A nice refreshing glass of sparkling water is always a welcome change from still water, but it can go flat quickly. If you’re worried that you won’t finish your sparkling water try adding it to your cooking. Sparkling can be used instead of still water – try it with pasta, it’s supposed to give it a lighter texture than boiling in still or swap out the milk in pancake batter to make fluffier pancakes.
Yoghurt
Yoghurt is a very versatile ingredient and you can easily use it as a substitute in a lot of recipes. If you’re making scones with a buttermilk recipe, opt for yoghurt instead (with one tablespoon of milk to make it a bit runnier). It’s also ideal for marinades – a great alternative to barbeque sauce on any chicken you’re going to cook on the BBQ over the next few months. Add yoghurt to spices and have a spicy crispy chicken burger perhaps?
This is another one where lollies are a fun treat. Here is a quick recipe (although we think you can use any fruit you like here!)
Ingredients
4 apples
2 tbsp lemon juice
100ml water
100g caster sugar
500g greek yoghurt
1 small handful of strawberries
1 small handful of blueberries
Method
- Peel, core and chop the apples.
- Put in a saucepan with the water, lemon juice and sugar.
- Cover and simmer, stirring occasionally for 15 minutes or until the apples are soft – set aside to cool.
- Put the mixture into a food processor and blend until smooth.
- Fold in the yoghurt.
- Slice the tops off the strawberries and cut them into slices. Fold the strawberry slices and blueberries into the apple and yoghurt mixture.
- Pour the mixture into ice lolly moulds and freeze for 6-8 hours until solid.
Source: Netmums
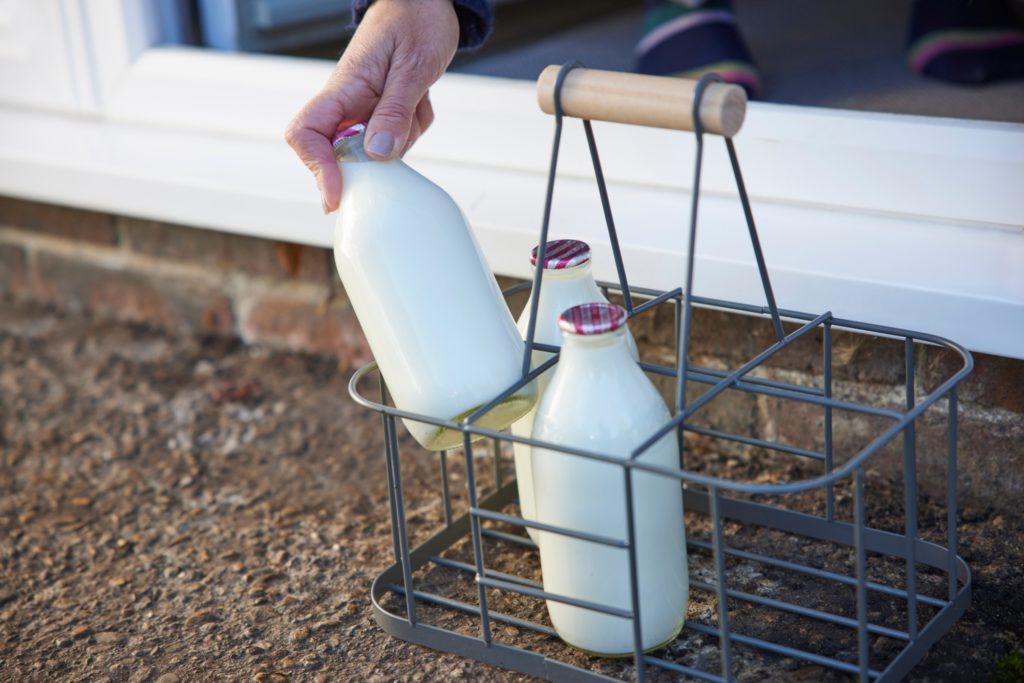
Milk
Milk is a great source of calcium for not only humans but plants! Calcium deficiency in plants can lead to trouble with shoots growing and issues with leaves and roots. You can also use it on the soil as the proteins and enzymes are also good for it.
To use milk as fertiliser (even expired milk), dilute the milk with water and spray on your plant. Leave it for an hour and then wipe away any excess milk from the leaves – you don’t want the milk to sit as this can harm your leaves. Also, make sure that it is a 50/50 mixture of milk and water.
Be sure to do your research to ensure that this is suitable for your plants and soil specifically.
Other tips to help reduce food waste
- Plan out your weekly meals ahead of time so you only buy what you need from us when you order.
- Bulk cook your meals and freeze portions to have later. This helps use up your ingredients so you’re not left with one of something you then end up throwing away.
- Clean cupboards and the fridge regularly, putting the soonest expiration date at the front so you grab it first without having to hunt for it. This is best done when you putting away your food shopping as it’s easier to organise your existing food.
Fresh and fruity mocktails fit for the Queen
With the Queen’s Jubilee weekend fast approaching, as is the predicted hot weather, we know there will be a lot of garden parties and Bank Holiday weekend get-togethers happening. However, for the special festivities forgo the usual fizzy drinks and try something a little more exciting with some tasty mocktails that even the Queen couldn’t say no to.
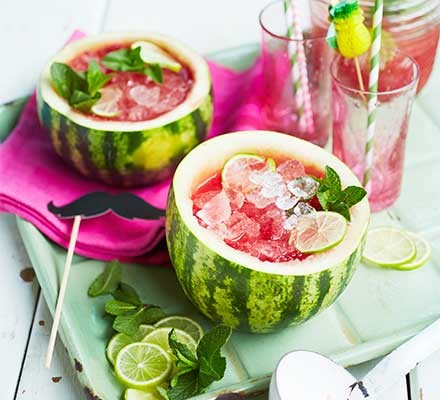
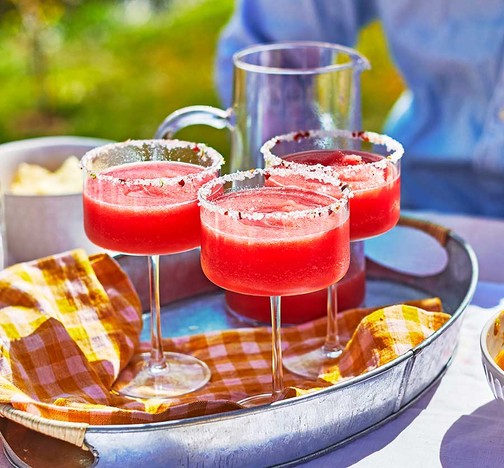
Watermelon lemonade
Ingredients
1 large or 2 small watermelons
250ml lemon juice (from a bottle or squeeze your own)
100g golden caster sugar
1L bottle sparkling water
1 lime, cut into slices
Mint, small handful
Ice, crushed
Method
- Cut the top off the watermelon and hollow it out using a large spoon, fishing out any pips along the way. Mash the flesh through a sieve into a bowl. Put the flesh in a blender (or use a tall jug and hand blender) with the lemon juice and sugar, whizz to a purée, then stir in the soda.
- Heap some ice into the hollowed-out watermelon and fill it with the lemonade mixture. Serve the rest in a jug with the lime slices and mint. Have a bowl of extra crushed ice on the side so people can help themselves.
Source: BBC Good Food
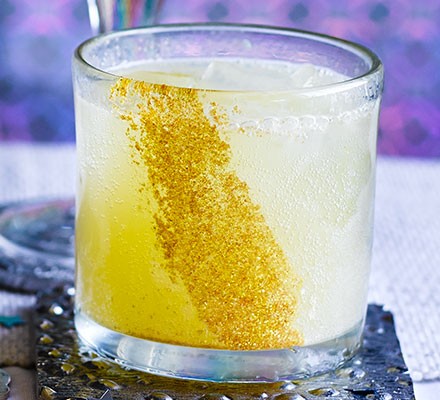
Pineapple and lime
Ingredients
1 tsp clear honey
Edible gold glitter
Coriander leaves, small bunch
1 lime, juice
750ml pineapple juice
Ice, handful
400ml tonic water
Method
- Dip a pastry brush in the honey and paint a line down one side of 4 tumblers. Sprinkle some edible gold glitter over the honey, dust off any excess, then put the glasses in the fridge.
- Chop the coriander leaves and place in a cocktail shaker with the lime juice, 100ml pineapple juice and a handful of ice. Shake together until the outside of the shaker feels cold. Strain into the glasses, add extra ice cubes and divide 650ml pineapple juice and the tonic water between the glasses.
Source: https://www.bbcgoodfood.com/recipes/shine-light
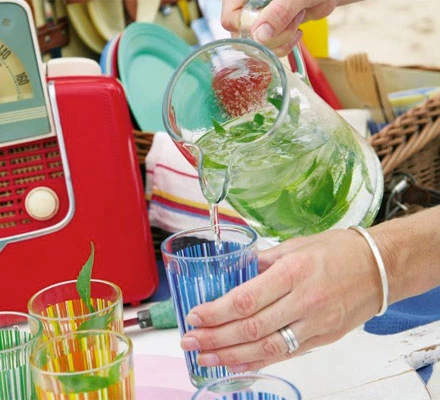
Apple, elderflower and mint sparkle
Ingredients
75ml elderflower cordial
1L apple juice
Mint leaves, small handful, roughly chopped
1L sparkling water
Method
- For a grown-up non-alcoholic drink, mix elderflower cordial with cloudy apple juice. Add a small handful of mint leaves, stir well, then pour into a chilled flask.
- At the picnic, pour half glasses of the juice and top up with sparkling water.
Source: BBC Good Food
Cranberry Spritz
Ingredients
100ml cranberry juice
½ orange, juiced
6 sage leaves
around 4 ice cubes
80ml sparkling white grape juice
Method
- Pour 50ml cranberry juice into two champagne coups or wine glasses. Divide the orange juice between them, then stir.
- Add 3 sage leaves and an ice cube or two to each glass, then top up with the sparkling grape juice.
Source: BBC Good Food
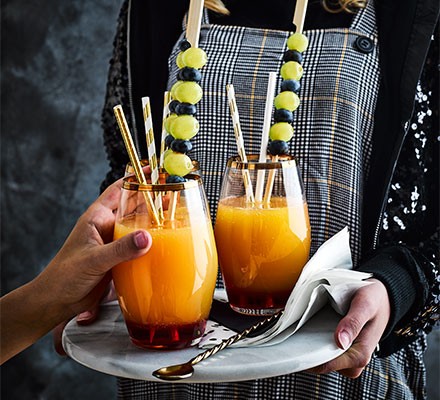
Fruity mocktail
Ingredients
A handful of green grapes
Blueberries, handful
4 tbsp grenadine
300-400ml orange juice
Sparkling water, to top up
Plus
4 bamboo skewers
Method
- Thread the grapes and blueberries onto the skewers to make stirrers.
- Pour the grenadine into four glasses. Gently tip the glasses and pour the orange juice down the inside of the glasses so it sits on top of the grenadine. Top up with sparking water, and add the stirrers to serve.
Source: https://www.bbcgoodfood.com/recipes/fruity-mocktail
Don’t forget…
You can also add a shot (or more) of gin, vodka, tequila or rum to turn these mocktails into cocktails!
Have your own mocktail recipes that you love? Don’t forget we have a large selection of drinks available for delivery so you have everything you need in the fridge ready to use at your next summer soiree.
Why not add a few drinks to your next doorstep delivery?
Diet coke
Lemonade
Orange juice
Apple juice
Cranberry juice
Pineapple juice
Fruit juices (including beetroot and tomato)
Spiced ginger, ginger beer and lemon refresher
Still water
Sparking water
Milkshakes
Celebrate Garden Week by giving your garden a makeover
National Garden Week is an opportunity to rediscover the joys of gardening and the beauty of our green spaces, while inspiring generations of gardeners. It takes place from 2nd to 8th May this year, with the Royal Horticultural Society kickstarting the festivities by unveiling four newly created community gardens on RHS Garden Day on 2nd May.
Suppose you’re inspired by the beauty of the RHS gardens – Wisley in Surrey, Bridgewater in Salford, Harlow Carr in Yorkshire, Hyde Hall in Essex, and Rosemoor in Devon – and want to celebrate. In that case, there are lots of events happening that you can attend. However, the RHS are also encouraging everyone to participate in their own gardens or outside spaces, by finding happiness in indulging their green fingers throughout the week.
Whether you are sowing seeds, repotting plants that have outgrown their tubs, adding nature spots in your gardens for the birds and bees, or simply going for a walk at a local green space, there are lots you can be doing for National Garden Week.
Create spaces for wildlife
Welcome wildlife into your garden by adding wildlife-friendly spaces that encourage them to visit. You can do this with a mix of food, housing and plants, depending on your garden size – there’s always something you can do to help wildlife!
To help birds, why not add various seeds and peanuts, as well as other bird feed and fat balls to bird tables and boxes around your garden? This also works well for balconies and smaller gardens.
Investing in bird boxes or feeders helps to encourage birds to your garden, but a great addition, which many do not consider, would also be bee nest box. Make sure to place your box in full sunshine, ideally south-east or east-facing. The box should be 1 metre from the ground and near to plants. Be aware of windy parts of your garden and position the box so that it is secure and cannot be dislodged by a big gust!
You may also want to consider leaving a section of your garden to grow wild (do not cut back flowers or mow the lawn), giving a safe space for animals.
Rejuvenate your flowerbeds
Give your plants a new lease on life by adding a nutrient-rich top soil, deadheading flowers to encourage second blooms and pulling out weeds.
Deadheading some annuals and perennials will encourage them to continue to bloom and help to maintain the appearance of your flowerbeds. Removing weeds makes it easier for your plants to get the nutrients they need, which may otherwise be taken by the unwanted weeds. Weeds must be pulled out by their roots and not the leaves to keep them from coming back year after year.
Adding a top soil helps extra oxygen to reach the plants and gives your plants the nutrients that it needs. Add a 2 or 3-inch layer of topsoil and turn into the existing soil by about 30cm. Working with moist soil will give the best results.
Decorate your garden with bark
Looking for a way to change your garden appearance without a major overhaul? Consider adding decorative elements to your garden that could have a lot of impact without a lot of work.
Here are three ways to use decorative bark that could benefit the appearance of your garden.
- Flowerbeds – make sure that your soil is moist and lay a membrane layer down first, then top with bark. This works best before your plant as it’s easier to cut holes in the membrane, but can be done at any point, you just have to make allowances for your existing plats.
- Pathways – if you’re garden paths are plain and uninteresting, add a layer of decorative bark to make it look a bit more attractive. This requires very little work, just weed beforehand to stop unwanted plants emerging down the line.
- Plant pots – simple yet effective, adding bark to your plant pots helps neaten up their appearance and give a cohesive look to all your pots. Add a membrane to moist soil, just like with your flower beds, before laying the bark.
Check out our full range of garden products here.
With spring finally here and Easter on its way, the Bank Holiday weekend is going to be one filled with family, friends and food! So, put on a spread to remember with this delicious menu of Easter favourites.

Slow cooker leg of lamb
Ingredients
2 tbsp olive oil
1.3kg boneless leg of lamb, tied
30g unsalted butter
2 tbsp plain flour
300ml lamb stock
200ml red wine
2 red onions, cut into wedges
2 garlic cloves, sliced
5 sprigs of thyme
5 sprigs of rosemary
mashed potatoes and steamed veg, to serve
Method
- Heat the oil in a large non-stick frying pan. Add the lamb and brown on each side for 4-5 mins. Set the slow cooker to low. Melt the butter in a saucepan until foaming, then stir through the flour. Whisk in the stock gradually until incorporated, add the wine and bring to the boil. Set aside.
- Put the onion, garlic, thyme and rosemary into your slow cooker and sit the lamb on top. Pour over the lamb gravy. Put the lid on and cook for 8 hrs or until soft and tender.
- Remove the lamb and set, covered, on a plate. Strain the liquid into a pan and simmer until slightly thickened. Serve the lamb thickly sliced or shredded (it’ll be quite soft) with mashed potatoes, green veg and the gravy.
Source: https://www.bbcgoodfood.com/recipes/slow-cooker-leg-lamb

No-peel braised carrots
Ingredients
300ml vegetable stock
300g baby topped carrots
2 tbsp butter
1 tsp caster sugar
1 tsp fennel seeds, crushed
Method
- Heat the vegetable stock, then tip the carrots into a deep-frying pan. Add the butter, sugar, fennel seeds and the hot stock. Season to taste.
- Simmer, uncovered, over a medium heat for 25-30 mins or until the carrots are cooked through and the liquid is reduced and glossy.
Source: https://www.bbcgoodfood.com/recipes/no-peel-braised-carrots
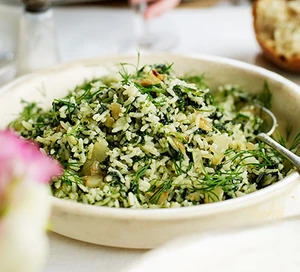
Spinach rice
Ingredients
100ml Greek extra virgin olive oil
1 onion, finely chopped
500g baby spinach leaves, washed and finely chopped
bunch dill, finely chopped
300g long-grain rice
juice 1-2 lemons
Method
- Heat the oil in a large pan, add the onion and gently cook until softened but not coloured. Add the spinach and half the dill. Cook on a high heat, stirring regularly, until the spinach has wilted down and all the liquid has evaporated.
- Stir in the rice and add 600ml water, then bring to the boil. Turn the heat right down again to a very gentle simmer, cover the pan with a tight-fitting lid and cook for 25-30 mins or until the rice has cooked and absorbed all the water. Give it a stir after 15 mins to ensure even cooking, adding a drop more water as required.
- When the rice is cooked, stir in the remaining dill, season well, squeeze over the lemon juice to taste, and serve.
Source: https://www.bbcgoodfood.com/recipes/spinach-rice
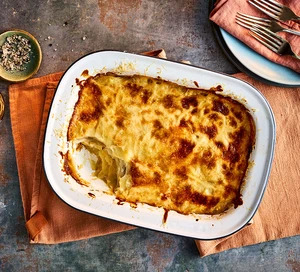
Scalloped potatoes
Ingredients
50g unsalted butter, plus extra for the dish
1 onion, thinly sliced
2 garlic cloves, chopped
50g plain flour
500ml whole milk
250ml chicken or vegetable stock
1kg potatoes, thinly sliced (use a mandoline for the best results)
75g parmesan, finely grated
Method
- Heat the oven to 180C/160C fan/gas 4 and butter a deep 20 x 30cm baking dish. Melt the butter in a pan over a medium heat and cook the onion and garlic with a pinch of salt for 8-10 mins until the onion has softened slightly. Tip in the flour, stir well, then cook for a few minutes more. Mix the milk and stock together, then gradually pour this in, whisking well between additions until everything is incorporated and you have a smooth sauce. Simmer for a few minutes, then season well.
- Lay half the sliced potatoes in a single layer in the buttered dish, slightly overlapping them if needed. Pour over half the sauce, then scatter over half the parmesan. Arrange the remaining potatoes on top, then pour over the remaining sauce and scatter with the remaining parmesan. Cover with foil and bake for 1 hr, then remove the foil and bake for another 30 mins until golden on top.
Source: https://www.bbcgoodfood.com/recipes/scalloped-potatoes
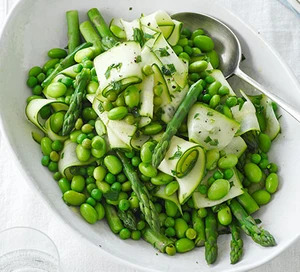
Spring vegetables
Ingredients
2 large courgettes, sliced into ribbons with a vegetable peeler
juice 1 lemon
200g asparagus spears, washed and trimmed
100g frozen peas
100g frozen broad beans
1 tbsp extra virgin olive oil
small pack parsley, roughly chopped
Method
Put the courgette ribbons in a large bowl with a pinch of salt and the lemon juice.
Bring a large saucepan of water to the boil and cook the asparagus for 2 mins, adding the frozen peas and broad beans for the final min. Drain well, pod the broad beans and toss together with the courgette ribbons. Drizzle over the olive oil, sprinkle on parsley and season to taste.
Source: https://www.bbcgoodfood.com/recipes/warm-spring-vegetables
SWEET EXTRAS
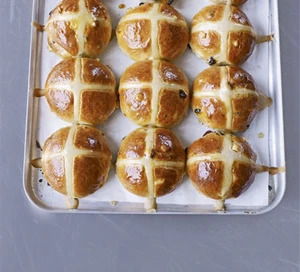
Hot cross buns
Ingredients
For the buns
300ml full-fat milk , plus 2 tbsp more
50g butter
500g strong bread flour
1 tsp salt
75g caster sugar
1 tbsp sunflower oil
7g sachet fast-action or easy-blend yeast
1 egg , beaten
75g sultanas
50g mixed peel
zest 1 orange
1 apple, peeled, cored and finely chopped
1 tsp ground cinnamon
For the cross
75g plain flour, plus extra for dusting
For the glaze
3 tbsp apricot jam
Method
- Bring 300ml full-fat milk to the boil, then remove from the heat and add 50g butter. Leave to cool until it reaches hand temperature. Put 500g strong bread flour, 1 tsp salt, 75g caster sugar and 7g sachet fast-action or easy-blend yeast into a bowl. Make a well in the centre. Pour in the warm milk and butter mixture, then add 1 beaten egg. Using a wooden spoon, mix well, then bring everything together with your hands until you have a sticky dough.
- Tip on to a lightly floured surface and knead by holding the dough with one hand and stretching it with the heal of the other hand, then folding it back on itself. Repeat for 5 mins until smooth and elastic. Put the dough in a lightly oiled bowl. Cover with oiled cling film and leave to rise in a warm place for 1 hr or until doubled in size and a finger pressed into it leaves a dent.
- With the dough still in the bowl, tip in 75g sultanas, 50g mixed peel, zest of 1 orange, 1 finely chopped apple and 1 tsp ground cinnamon. Knead into the dough, making sure everything is well distributed. Leave to rise for 1 hr more, or until doubled in size, again covered by some well-oiled cling film to stop the dough getting a crust.
- Divide the dough into 15 even pieces (about 75g per piece). Roll each piece into a smooth ball on a lightly floured work surface. Arrange the buns on one or two baking trays lined with parchment, leaving enough space for the dough to expand. Cover (but don’t wrap) with more oiled cling film, or a clean tea towel, then set aside to prove for 1 hr more.
- Heat oven to 220C/200C fan/gas 7. Mix 75g plain flour with about 5 tbsp water to make the paste for the cross – add the water 1 tbsp at a time, so you add just enough for a thick paste. Spoon into a piping bag with a small nozzle. Pipe a line along each row of buns, then repeat in the other direction to create crosses. Bake for 20 mins on the middle shelf of the oven, until golden brown.
- Gently heat 3 tbsp apricot jam to melt, then sieve to get rid of any chunks. While the jam is still warm, brush over the top of the warm buns and leave to cool.
Source: https://www.bbcgoodfood.com/recipes/hot-cross-buns

Easter biscuits
Ingredients
300g plain flour, plus extra for dusting
150g white caster sugar
150g slightly salted butter, chopped
1 large egg
2 tsp vanilla extract or vanilla bean paste
For the iced option
500g royal icing sugar
your favourite food colouring gels
For the jammy middle
Icing sugar, for dusting
400g apricot jam, or lemon curd
Method
- Weigh the flour and sugar in a bowl. Add the butter and rub together with your fingertips until the mixture resembles wet sand, with no buttery lumps. Beat the egg with the vanilla, then add to the bowl. Mix briefly with a cutlery knife to combine, then use your hands to knead the dough together – try not to overwork the dough, or the biscuits will be tough. Shape into a disc, then wrap in cling film and chill for at least 15 mins. Heat oven to 180C/160C fan/gas 4. Line two baking sheets with baking parchment.
- Dust a work surface with flour. Halve the dough, then roll one half out to the thickness of a £1 coin. Use an egg-shaped cookie cutter (ours was 10cm long; you could also make a cardboard template to cut around) to stamp out as many cookies as you can, then transfer them to one of the baking sheets, leaving a little space between the biscuits. Repeat with the other half of the dough. If you want to make jammy biscuits, use a small circular cutter to stamp holes in half of the biscuits (where the yolk would be). If you intend to make both iced and jammy biscuits, only stamp holes in a quarter of the biscuits.
- Bake for 12-15 mins, until the biscuits are pale gold. Cool on the sheets for 10 mins, then transfer to a wire rack to cool fully. Once cool, decorate to your liking (see next steps). Will keep in an airtight container for up to five days.
- To decorate the biscuits with icing, add enough water to the icing sugar to make a thick icing – it should hold its shape without spreading when piped. Transfer about a third of the icing to a piping bag fitted with a very small round nozzle (or just snip a tiny opening at the tip). Pipe an outline around the biscuits, then draw patterns in the middle – lines, spots and zigzags work well. Leave to dry for 10 mins. Divide the remaining icing between as many colours as you’d like to use, then use the gels to dye them. Loosen each icing with a few drops of water, then transfer them to piping bags. Use the coloured icing to fill the empty spaces on the biscuits. You may need to use a cocktail stick to tease it into the corners. Once covered, leave to dry for a few hours.
- To make the jammy middle biscuits, dust the biscuits with holes in the middle with a heavy coating of icing sugar. Spread the jam or curd generously over the whole biscuits, then sandwich the dusted biscuits on top of them.
Source: https://www.bbcgoodfood.com/recipes/iced-easter-biscuits
Invite the flavours of spring into your home
With spring just a few weeks away, it’s time to get excited about banishing the extra layers (and cold weather!), putting away the slow cooker, forgetting the stews and pies, and instead opting for the scrumptious delights that spring has to offer.
As the flowers start to bloom, and strawberries and apricots come into season, the recipes to be enjoyed are endless. Colourful displays incorporating your favourite fruits and vegetables are a must-have at this time of year, and we’ve picked out a selection of tasty sweet treats that we know you’ll enjoy making – and even more so eating!
Plus, if you bake any of these delicious bakes, be sure to share them with us on Facebook or Twitter! We can’t wait to see your baked creations.
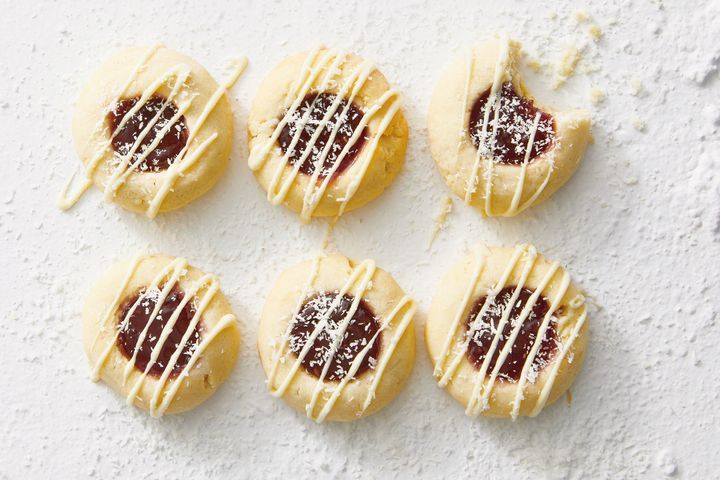
Jam Cheesecake Cookies
Ingredients
125g cream cheese, at room temperature, chopped
125g unsalted butter, at room temperature, chopped
155g caster sugar
2 tsp vanilla extract
250g plain flour, plus extra, for dipping
155g strawberry jam
75g white chocolate, melted
2 tsp desiccated coconut
Method
- Preheat oven to 160C/140C fan. Line 2 baking trays with baking paper. Use electric beaters to beat the cream cheese, butter and sugar in a bowl until pale and creamy. Beat in the vanilla. Use a spatula to fold in the flour until just combined.
- Roll level tablespoonfuls of mixture into balls. Place on prepared trays. Dip your thumb in flour and use it to make a 2.5cm indent in each biscuit. Place a spoonful of jam in each indent. Bake the biscuits for 15 minutes or until light golden underneath (biscuits will still be pale on top). Allow to cool, on trays, for 5 minutes before transferring to a wire rack to cool completely.
- Drizzle cookies with melted chocolate and sprinkle with coconut.
Source: https://www.taste.com.au/recipes/jam-cheesecake-cookies-recipe/5b3gkgna
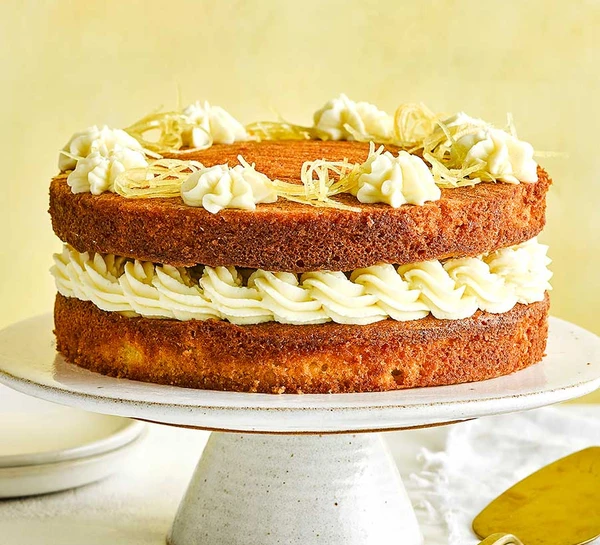
Lovely lemon layer cake
Ingredients
225g unsalted butter, softened
225g caster sugar
4 large eggs
225g self-raising flour
1 tsp baking powder
75g natural yogurt
1 tsp vanilla bean paste or extract
3 lemons, zested
For the drizzle
150g granulated sugar
3 lemons, zest of 2 pared into strips, juiced (you’ll need 60ml)
For the icing
150g unsalted butter, softened
150g icing sugar, sieved
1 tsp vanilla bean paste or extract
300g full-fat soft cheese
Method
- Heat the oven to 180C/160C fan/gas 4 and line the base of two 20cm sandwich tins with baking parchment. Beat the butter and sugar together for 3 minutes using an electric whisk until smooth and fluffy. Add the eggs, one at a time, beating well between each addition and scraping down the sides of the bowl. Fold in the flour and baking powder until well incorporated, then fold in the yoghurt, vanilla and lemon zest. Divide between the tins and bake for 30-35 mins until golden and a skewer inserted into the middles comes out clean.
- Meanwhile, make the drizzle. Tip the sugar, lemon juice and 100ml water into a small pan set over medium heat and stir until dissolved. Add the lemon zest, bring to a boil and simmer for 2-3 mins until the zest has softened and the liquid is syrupy. Remove the zest to a sheet of baking parchment using a slotted spoon, and remove the syrup from the heat.
- Leave the sponges to cool for 10 mins in the tins, then pour over the warm drizzle. Leave to cool completely.
- For the icing, beat the butter and icing sugar together using an electric whisk for 4-5 minutes until smooth, scraping down the sides of the bowl as you go. Add the vanilla and soft cheese and beat for 4 minutes more until thick and creamy. Don’t worry if it doesn’t look thick at first – it will loosen, then thicken again as you beat it.
- Remove the cooled sponges from the tins. Spoon the icing into a piping bag fitted with a star nozzle. Put one sponge on a cake stand or serving plate, and pipe just under half the icing around the edge using a circular motion for a wavy effect. Pipe a little more icing over the empty middle (this doesn’t need to be neat) and smooth with the back of a spoon. Chill for 45 mins-1 hr until set. Top with the second sponge, then pipe eight blobs of icing around the edge at regular intervals, leaving a gap between each. Spoon the candied lemon zest into each gap, then serve.
Source: https://www.bbcgoodfood.com/recipes/lemon-layer-cake-with-soft-cheese-icing

Bunny Carrot Cake
Ingredients
For the caramelised carrots
225-250g small or baby carrots, peeled and halved lengthways
juice 1 orange (from cake ingredients)
25g butter
4 tbsp light soft brown sugar
200g light soft brown sugar, plus 3 tbsp
150ml light rapeseed oil (we used Cooks & Co with natural butter flavour), plus extra for greasing
100g natural yoghurt, plus extra to serve (optional)
3 large eggs
2 tsp vanilla extract
zest 3 oranges, juice of 2 (save juice of last orange for the carrots, below)
300g self-raising flour
1 tbsp mixed spice
1 tsp ground cinnamon
250g coarsely grated carrot
crème fraîche , to serve (optional)
Method
- First, make the caramelised carrots. Put the carrots in a saucepan so they can sit in just about a single layer. Add the orange juice, butter, sugar and enough water to cover the tops of the carrots by just 1cm. Bring to a boil, then cook until the water has almost evaporated and the carrots are left in a sticky syrup – you may want to reduce the heat if the liquid looks more syrupy and go a little slower at the end so the carrots don’t catch. Can be made up to 1 day ahead.
- Heat oven to 160C/140C fan/gas 3. Grease a 23cm cake tin. Lift the candied carrots from the pan and syrup, and arrange in the base of the tin, cut side down. Keep the pan and syrup for later.
- Whisk together the 200g brown sugar, the oil, yoghurt, eggs, vanilla and zest from 2 oranges. Mix the flour, mixed spice, cinnamon and grated carrot in a big mixing bowl. Stir in the whisked mixture until smooth, then spoon over the carrots in the tin – be careful not to dislodge their arrangement too much. Bake for 45-50 mins until a skewer poked in comes out clean. Cool in the tin for 20 mins.
- Meanwhile, add the orange juice to the syrup pan with the 3 tbsp brown sugar. Simmer together until slightly reduced, then stir in the remaining zest.
- Turn the cake out onto a plate and spoon over the syrup. Eat just warm or at room temperature with more yoghurt or crème fraîche.
Source: https://www.bbcgoodfood.com/recipes/bunny-carrot-cake
Indulge your taste buds with these blue cheese tips
When it comes to blue cheese, many of us will indulge in and love the distinctive flavour, while some people will quickly disagree, however, this pungent salty and sharp-tasting cheese adds colour and flavour to any meal or cheeseboard, and shouldn’t be overlooked.
Though, if want to try it for the first time and you’re struggling with how to incorporate blue cheese into your meals or if you need new ways to enjoy this marbled delight, then check out these simple ideas.
Salads
Forget the feta, it’s time to bring your salad to life with a sprinkling of blue cheese to add tang to what is usually considered a simple meal. Blue cheese complements a range of salads including watermelon and cucumber salad, watercress and pecan salad, potato salad and even a Caesar salad.
Dessert
This may sound a little more obscure than the other ideas, however blue cheese typically pairs well with sweet ingredients such as honey, dried fruit, apples, figs and walnuts, meaning it would complement a dessert very well. Next time you make a pecan or pear pie sprinkle the top with blue cheese. You can also find numerous recipes for a blue cheese cheesecake, with the cheese incorporated into the cream cheese filling!
If you want to ease your taste buds in slowly, why not try this easy blue cheese-stuffed strawberry recipe for an alternative to the traditional chocolate strawberries?
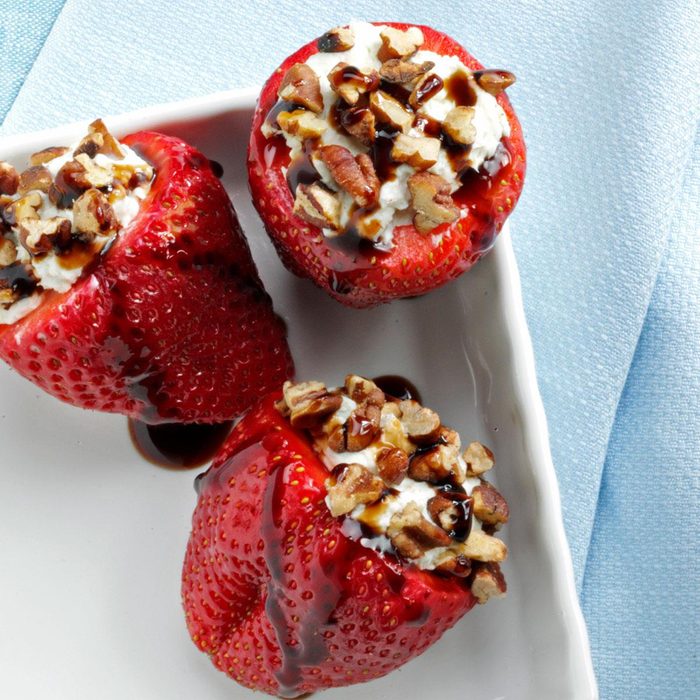
Ingredients
½ cup balsamic vinegar
3 ounces fat-free cream cheese
1/2cup crumbled blue cheese
16 large fresh strawberries
3 tbsp pecans, toasted, finely chopped
Method
- Place vinegar in a small saucepan. Bring to a boil; cook until liquid is reduced by half. Cool to room temperature.
- Meanwhile, in a small bowl, beat cream cheese until smooth. Beat in blue cheese. Remove stems and scoop out the center of the strawberries; fill each with about 2 tsp cheese mixture. Sprinkle pecans over filling, pressing lightly. Chill until serving. Drizzle with balsamic vinegar.
Source: www.tasteofhome.com/recipes/blue-cheese-stuffed-strawberries/
Dip
A nice thick blue cheese dip goes well with all manner of snacks and other dishes. Celery sticks, tomatoes, carrot sticks, even plain crisps or tortilla chips!
Make a simple dip using mayonnaise, crème fraîche, white wine vinegar and Worcestershire sauce to try it for yourself. Alternatively, sour cream, mayonnaise, parsley, lemon juice, salt and pepper, with a good helping of cheese, is a delicious dip.
Ingredients
300g soured cream or crème fraîche
100g mayonnaise
150g blue cheese, crumbled
1 tbsp white wine vinegar
1 tsp Worcestershire sauce
1 head celery, cut into batons
Method
- In a medium-sized bowl, mix the soured cream, mayonnaise, blue cheese, white wine vinegar, Worcestershire sauce and some seasoning. Pour into a serving bowl and use as a dip for the celery sticks.
Source: www.bbcgoodfood.com/recipes/celery-sticks-blue-cheese-dip
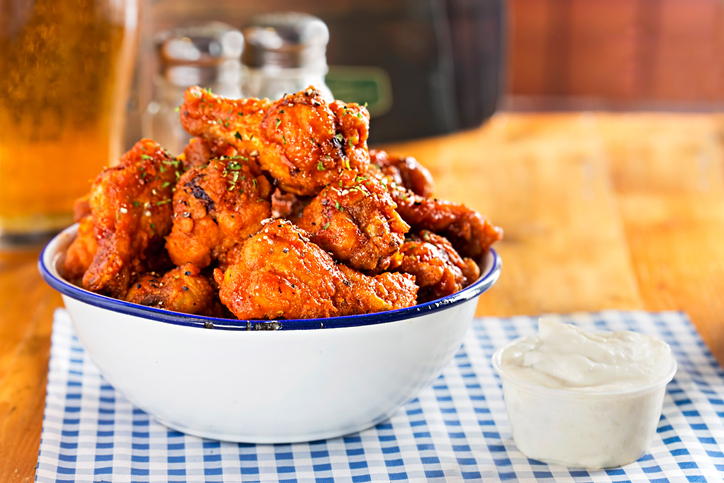
Blue cheese and buffalo sauce
If you love hot sauce on your food then buffalo sauce and blue cheese is a combo that you can’t overlook. Enjoyed by many, the rich, spicy buffalo sauce pairs with the tangy, salty blue cheese creating a mouth-watering mixture. Not for the faint of heart, this pairing is usually common place with chicken wings or bites.
Coleslaw
A popular side to any meal, many people stick to the simple recipe that involves cabbage, carrots, mayo, salt, and pepper, although some people might add onions, lemon juice, honey or mustard. So, mixing up your coleslaw with blue cheese could really give this side dish a kick.
If you’re wondering about the best way to incorporate blue cheese into your coleslaw, there are a few ways, although this recipe, which also adds includes bacon, is a great way to try it for the first time.
Ingredients
8 bacon slices, chopped
¾ cup mayonnaise
2 tbsp red wine vinegar
1 tbsp honey
16 ounces chopped cabbage, carrot, onion
1 cup crumbled blue cheese
Method
- Cook bacon in large skillet until crisp. Using a slotted spoon, transfer bacon to paper towels.
- Whisk mayonnaise, vinegar, and honey in large bowl. Stir in chopped cabbage, carrot and onion, cheese, and bacon. Season with salt and pepper and toss to coat. Cover and chill.
Source: www.bonappetit.com/recipe/blue-cheese-coleslaw-2
Garlic bread
It may not seem like the obvious choice, but adding blue cheese to your homemade garlic bread can be a game changer. Garlic and blue cheese pair nicely together, and as long as the bread isn’t overpowering the cheese, they can create a taste sensation in your mouth.
If all this talk of cheese has got you in the mood for a cheesy dinner, then be sure to add blue cheese to your next Doorstep Delivery!
A delicious festive feast with all the trimmings
Christmas dinner is the standout meal of the year, offering a mouth-watering selection of veggies, must-have sides and moist meat that falls apart in your mouth. You’re usually so full from the main course that dessert seems impossible to manage, and yet the sweet treat is too tempting to say no to.
If you enjoy a big spread on Christmas Day, we have put together some of our favourite recipes for tasty traditional dishes – as well as some not so traditional ones – to help you make Christmas dinner the highlight of the year.

THE MAIN ATTRACTION: Turkey crown with roast garlic and pancetta
Ingredients
2-2.5kg turkey crown
Olive oil
10 thin slices of streaky bacon or pancetta
Small rosemary sprigs
1 large onion, cut into 8 wedges
For the stuffing
4 tbsp olive oil, plus extra to drizzle
2 medium onions, chopped
3 garlic cloves, finely chopped
50g pine nuts
85g grated parmesan
6-8 slices pancetta, chopped
1 small loaf ciabatta, to give 280g/10oz breadcrumbs
4 tbsp flat-leaf parsley, chopped
1 tbsp rosemary, finely chopped
1 lemon, zest, finely grated
2 eggs, beaten
For the garlic
3 whole bulbs garlic, halved horizontally
1 lemon, cut into 6 wedges
For the gravy
4 tsp plain flour
175ml medium-sweet marsala
850ml turkey or chicken stock
Method
- Pre-heat oven to 190°C/170°C Fan/Gas Mark 5. Rinse the turkey then pat dry with kitchen paper. Weigh it to calculate the cooking time, allowing 20 mins per kg, plus 70 mins (or 90 mins when roasting a crown over 4kg). Sit the turkey on a board, very lightly rub all over with olive oil and season with pepper. Lay the pancetta or streaky bacon over the top of the turkey, slightly overlapping to cover it. Tuck the slices under the bird to secure at the bottom. Insert small rosemary sprigs haphazardly between the slices. Season with pepper. Tie the crown across in 2-3 places with butcher’s string, to hold the shape together. Put the onion wedges in the middle of a large roasting tin and sit the crown on top. Cover the turkey with a loose tent of foil, then roast following your calculated time.
- To make the stuffing, heat 3 tbsp of the oil in a large frying pan. Tip in the onions and garlic, and fry for 5-8 mins until softened and starting to turn golden. Push the onions to one side of the pan, then add the pine nuts and continue to fry for 1 min more, stirring the nuts until golden. Remove from the heat and cool slightly. Stir in the remaining oil, all but a small handful of the Parmesan and the remaining stuffing ingredients. Season with salt and pepper. Loosely spoon stuffing mixture (don’t pack it down) into an oiled ovenproof dish, drizzle with a little extra olive oil, sprinkle with remaining Parmesan, then lay a sheet of baking parchment on top. Set aside. Can be made 1 day ahead and chilled.
- Thirty mins before the end of the cooking time, remove the turkey and increase the oven to 200°C/180°C Fan/Gas Mark 6. If you are roasting potatoes put them in now. Roast the garlic. Remove the foil, place the garlic halves and lemon wedges around the turkey, then baste them and the turkey with the cooking juices. Return the tin to the oven and continue to roast for the final 30 minutes. To test if cooked, pierce the fattest part of the crown with a skewer – the juices should run clear, not pink. If they are pink, continue to roast, checking at 10 min intervals.
- Remove the turkey, garlic and lemon from the oven, transfer to a warm serving platter and rest, covered loosely with foil, for 30 mins before carving. Meanwhile, increase oven to 220°C/200°C Fan/Gas Mark 7. Put the stuffing in the oven and bake for 20 mins, then remove the paper and bake for a further 5 mins until the stuffing is golden.
- To make the gravy, pour off any excess fat from the roasting tin but leave the juices and onions. Stir all the sticky bits from the bottom of the tin into the juices. Set tin over a medium heat, add the flour and cook, stirring continuously, for 2 mins. Pour in the Marsala and simmer for 2 mins. Pour in the stock, bring to the boil, then simmer for 5-10 mins or until reduced to your liking. Season with pepper if needed. Strain the gravy into a pan, warm through, then pour into a jug. Serve the turkey garnished with rosemary sprigs, surrounded with the roasted garlic and lemon, and accompanied by the gravy and stuffing.
Source: BBC Good Food
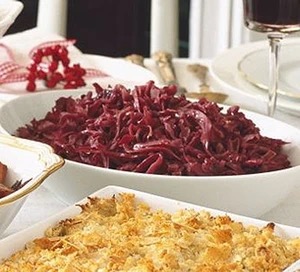
Braised red cabbage with cider and apples
Ingredients
1 ½ kg red cabbage
2 onions, chopped
4 Granny Smiths apples, peeled and cored and chopped
1 orange or 2 clementines, zest
2 tsp ground mixed spice
100g light soft brown sugar
3 tbsp cider vinegar
300ml dry cider
25g butter
Method
- Peel off the outer leaves from the cabbage and discard. Quarter the cabbage, removing the tough stem, then thinly slice. Arrange a layer of the cabbage on the bottom of a large saucepan, followed by some of the onions, apples, zest, mixed spice, sugar and seasoning. Continue to create layers until you have used up the ingredients.
- Pour over the vinegar and cider and dot the butter on top. Bring to the boil then simmer with a lid on over low heat for 1½ hrs, until tender. The cabbage will keep for 2 days, covered, in the fridge or freeze for up to 1 month. Reheat in either a pan or in the microwave.
Source: https://www.bbcgoodfood.com/recipes/braised-red-cabbage-cider-apples
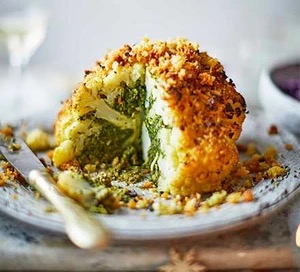
Roasted stuffed cauliflower
Ingredients
1 large or 2 small cauliflowers (about 850g)
5 tbsp olive oil
4 tbsp breadcrumbs
For the stuffing
250g kale, chopped
1 tbsp milled linseed
1 onion, chopped
2 garlic cloves, chopped
½ small pack sage, leaves chopped
½ small pack rosemary, leaves chopped
150g cooked chestnuts, finely chopped, plus 30g for the topping
2 lemons, zest
Nutmeg, grated
Method
- Trim and discard the cauliflower leaves. Turn the cauliflower upside-down on a chopping board and use your knife to carefully cut out the stalk and core, leaving a cavity – the florets should still be holding together.
- Bring a large pan of salted water to the boil. Submerge the cauliflower and cook for 7 mins, then remove with two slotted spoons and set aside to steam dry. Add the kale to the pan and cook for a min or so until wilted. Drain, then run under cold water to cool. Squeeze out the excess liquid and roughly chop.
- To make a linseed ‘egg’ (this will bind the stuffing together), mix the ground linseed with 3 tbsp water and set aside for 5-10 mins until gluey. Meanwhile, heat 2 tbsp oil in a frying pan, add the onion and a pinch of salt, and cook until softened, then stir in the remaining stuffing ingredients, including the kale, and cook for a min or so more. Remove from the heat and season, then put in a blender with 150ml water and the linseed egg and blitz to a thick purée. Transfer to a piping bag.
- Pipe the stuffing mixture into every nook and cranny of the cauliflower, getting in as much of the purée as you can. See tip. Transfer to a baking tray lined with parchment. Can be made up to this point in the morning and kept in the fridge.
- Heat oven to 200°C/180°C fan/gas 6. Mix the remaining chestnuts with the breadcrumbs and some seasoning. Spoon the remaining oil all over the cauliflower, then pat on the breadcrumb chestnut mix. Roast for 45 mins until golden brown and tender (place under a hot grill for the last part of cooking time if it needs to crisp-up). Serve with any crisp bits that have fallen onto the baking tray.
Top tip: Pipe the purée in from the bottom first, filling as many holes as possible, then turn it over onto the lined baking tray. From the top, squeeze as much as possible between the florets.
Source: BBC Good Food
![]()
Triple pigs in blankets
Ingredients
24 miniature chipolatas
8 rashers smoked bacon
1 tbsp sunflower oil
Method
Heat oven to 200C/180C fan/gas 6. Pile the sausages in groups of three and wrap a piece of bacon around each trio. Arrange on a baking tray and brush or drizzle with the oil. Roast in the oven for 30-35 mins until the chipolatas are golden and the bacon is crisp.
Source: https://www.bbcgoodfood.com/recipes/triple-pigs-blankets
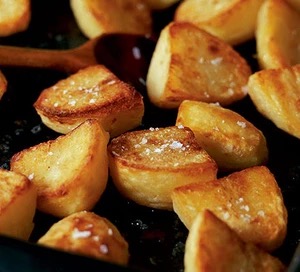
Ultimate roast potatoes
Ingredients
1kg Potatoes
100g duck or goose fat (for a luxurious taste), or 100ml/3½fl oz olive oil
2 tsp flour
Maldon salt, to serve
Method
- Put a roasting tin in the oven (one big enough to take the potatoes in a single layer) and heat oven to 200°C/180°C Fan/Gas Mark 6.
- Peel 1kg potatoes and cut each into 4 even-sized pieces if they are medium size, 2-3 if smaller (5cm pieces).
- Drop the potatoes into a large pan and pour in enough water to barely cover them.
- Add salt, then wait for the water to boil. As soon as the water reaches a full rolling boil, lower the heat, put your timer on and simmer the potatoes uncovered, reasonably vigorously, for 2 mins.
- Meanwhile, put 100g duck or goose fat or 100ml olive oil into the hot roasting tin and heat it in the oven for a few mins, so it’s really hot.
- Drain the potatoes in a colander then shake the colander back and forth a few times to fluff up the outsides.
- Sprinkle with 2 tsp flour and give another shake or two so they are evenly and thinly coated.
- Carefully put the potatoes into the hot fat – they will sizzle as they go in – then turn and roll them around so they are coated all over.
- Spread them in a single layer making sure they have plenty of room.
- Roast the potatoes for 15 mins, then take them out of the oven and turn them over.
- Roast for another 15 mins and turn them over again. Put them back in the oven for another 10-20 mins, or however long it takes to get them really golden and crisp. The colouring will be uneven, which is what you want.
- Scatter with Maldon salt and serve straight away.
Source: BBC Good Food
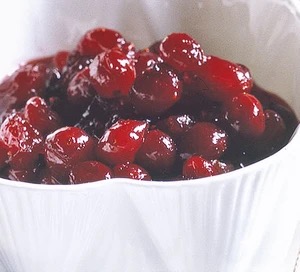
Simple cranberry sauce
Ingredients
100g light muscovado sugar
100ml orange juice, fresh or from a carton
250g pack of fresh or frozen cranberries
- Tip 100g light muscovado sugar and 100ml orange juice into a pan, then bring to a boil.
- Stir in 250g fresh or frozen cranberries, then simmer until tender but still holding their shape – this will take about 5 mins if using frozen cranberries or 8-10 mins if using fresh.
- The sauce will thicken as it cools. Will keep in the fridge for 1 week. On the day, bring to room temperature before serving.
Source: https://www.bbcgoodfood.com/recipes/really-simple-cranberry-sauce

THE TEMPTING DESSERT: White forest meringue roulade
Ingredients
Butter, for the tin
100g white chocolate, 50g grated, 50g melted and cooled a little
For the meringue
4 large egg whites
1 tsp lemon juice
200g white caster sugar
icing sugar, for dusting
For the cherry filling
300g frozen black cherries, saving a few whole ones to decorate
50ml orange juice
100g white caster sugar
pinch of ground cloves
½ tsp cornflour
For the cream filling
400ml double cream
50g icing sugar
½ tsp vanilla bean paste or extract
Method
- Pre-heat oven to 180°C/160°C Fan/Gas Mark 4. Butter, then line a 23 x 32cm baking tray. Using an electric hand whisk, beat the egg whites, lemon juice and a pinch of salt until stiff.
- Add 1 tbsp of the caster sugar, then whisk until the mixture makes stiff peaks. Repeat with the rest of the sugar, spoon by spoon, until the mix is thick and shiny. Spread into the tin, then bake for 15 mins or until crisp to the touch and lightly golden in places. Leave to cool.
- Simmer the cherries, orange juice, sugar and cloves for 10 mins, or until the cherries are soft but still holding their shape. Mix the cornflour with 2-3 tsp cold water to make a paste, stir into the cherries and cook for a couple mins more until the juices thicken. Leave to cool.
- To assemble, sift icing sugar over a large piece of parchment, then carefully flip the meringue onto it. Remove the tin and parchment. With a short end facing you, score a line 2cm into the meringue.
- Whip the cream, icing sugar and vanilla until thick but not stiff, then spread over the meringue. Spoon over about half of the cherry sauce and scatter with the grated chocolate. Roll up the roulade, starting with the scored short end and using the paper underneath to help.
- To serve, drizzle with the melted white chocolate. Top with a few of the whole cherries and serve the remaining sauce on the side.
Source: https://www.bbcgoodfood.com/recipes/white-forest-meringue-roulade
Top tip: Freeze the roulade for up to a month then defrost overnight. Freeze by setting on a parchment-lined tray then, once firm, wrap the parchment around it and cover with cling film. Freeze the remaining cherry sauce for up to a month.
We hope we’ve inspired you this Christmas to make a few dishes you might not normally have tried for the big day!
Merry Christmas.
About our cheese producers, Highland Fine Cheeses & Barber’s Farmhouse
In the last few months, we’ve introduced several new cheese producers to our online shop and while you may be familiar with the Snowdonia Cheese Company from our recent blog, you might not be familiar with two of our other fantastic cheese suppliers.
Highland Fine Cheeses
Highland Fine Cheeses started with Reggie and Susannah Stone and their micro dairy in the Highlands, consisting of just 14 Dairy Shorthorn cows and bull called Geordie.
Having produced cheese since the 1950s, Highland Fine Cheeses was actually created purely by accident after Reggie complained that no one made ‘Crowdie’ anymore.
For those not in the know, Crowdie is where spare milk would set and form a curd. This was then scrambled (like eggs) and hung up in a muslin to drain the whey. Add some salt and you have a simple preserved milk!
The pair set about making Crowdie and made a little more than intended – 10 gallons in fact. From there, the company have gone on to produce award-winning artisan cheeses loved by many. Today the company is run by their son Rory and they focus on mould-ripened cheese with brie, blue and washed rind styles.
Why not try it for yourself?
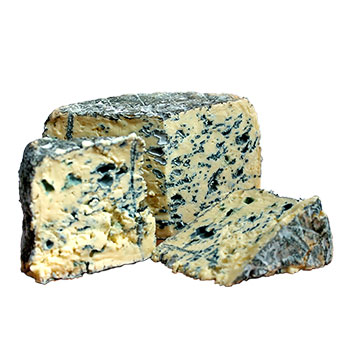
Strathdon Blue
Buttercream icing on the nose; voluptuous maturity on the palate.
More complex than most Blues with bold cracks and streaks, this creamy, juicy cheese yields to the touch and fills the mouth with a delightfully fudgy texture, finishing on balanced notes of salt and steel. You need nothing more than a simple cracker or chunk of crusty loaf.
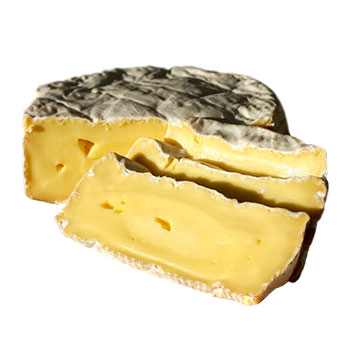
Morangie Brie
Edible white rind, rich creamy paste with mild mushroom and grass undertones and a silky texture that melts in your mouth when ripe.
Named after the Glen of Tranquillity, this classic-style Brie is a dream on a cheese board or baked in the oven.
Barber’s Farmhouse
In 1833, Daniel Barber began making cheese on his Somerset farm, starting in motion an almost 190-year legacy, which has seen six generations of Barbers take on the task of cheese making.
Their award-winning cheese is now manufactured on the Barber’s 3,000-acre farm, with more than 2,500 cows. The family-run business is determined to keep authentic Cheddar-making alive and use traditional techniques paired with innovation.
The farmers use age-old ‘Cheddaring’ methods to ensure they produce the best cheese and are committed to looking after the land, animals and surroundings as the better the environment, the better cheese they produce!
Want to try Barber’s Farmhouse cheese for yourself?
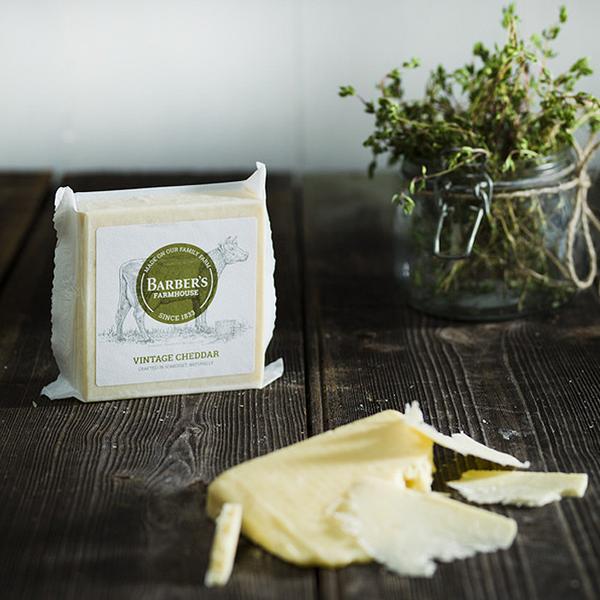
Barber’s Farmhouse Vintage
Barber’s Farmhouse Vintage Cheddar is one of the only cheddars in the world with PDO accreditation. Made with traditional starter cultures, West Country milk and using age-old methods, it’s typically matured for 18 months.
Robust and powerfully rich with a firm to brittle body that retains a smooth and creamy texture.
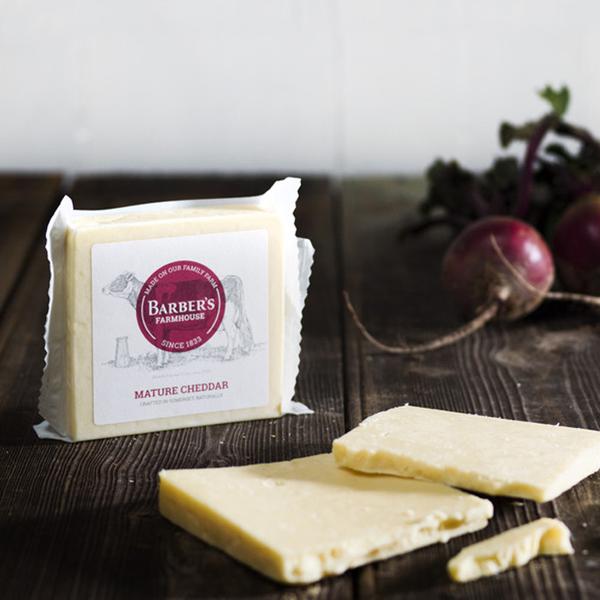
Barber’s Farmhouse Mature
Made with traditional starter cultures, West Country milk and using age-old methods, Barber’s Farmhouse Mature Cheddar has PDO status. Typically matured for up to 12 months, it’s less intense than our vintage cheeses but still full of the flavour and character of traditional farmhouse cheddar.
A rounded balance and rich flavour with a firm yet creamy texture.
Have we got your mouth-watering for a large slice of cheese? Add these tasty cheeses to your next Doorstep Delivery and let us know how you found these artisan cheeses.
Order:
Barber’s Farmhouse Mature
Barber’s Farmhouse Vintage
Highland Fine Cheese Morangie Brie
Highland Fine Cheese Strathdon Blue
Sources:
Barber’s Farmhouse Cheese: www.barbers.co.uk
Highland Fine Cheeses: www.hf-cheeses.com